

How to refurbish an old chemical storage tank?
Oct 05, 2026
Hey there! As a supplier of chemical storage tanks, I've seen my fair share of old tanks that are in need of a little TLC. Refurbishing an old chemical storage tank can be a cost - effective way to extend its lifespan and ensure it continues to function safely and efficiently. In this blog, I'll walk you through the steps on how to refurbish an old chemical storage tank.

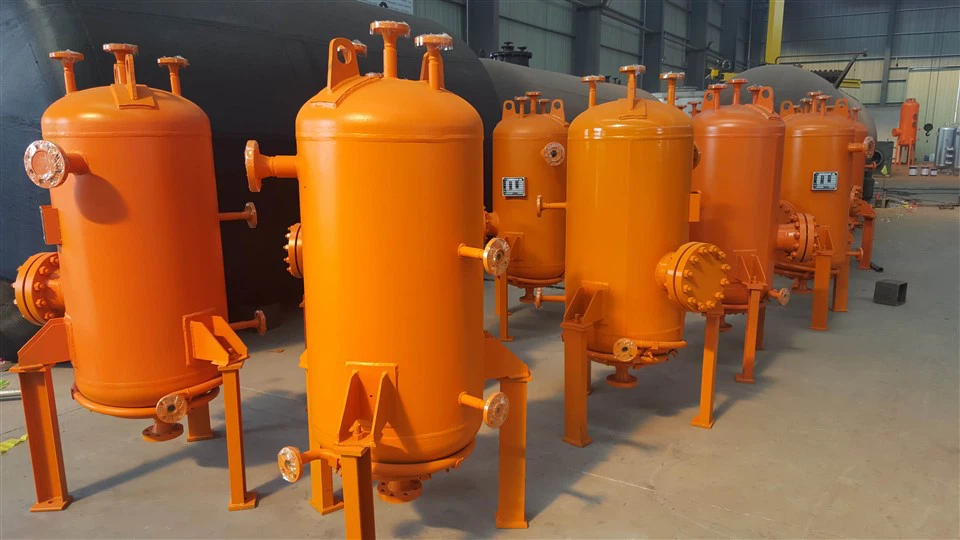
Step 1: Inspection
The first step in refurbishing an old chemical storage tank is a thorough inspection. You need to know exactly what you're dealing with. Check for any signs of corrosion, leaks, or structural damage. Look at the interior and exterior of the tank. Corrosion can eat away at the metal over time, weakening the tank's structure. Leaks can be a major safety hazard, especially when dealing with chemicals.
Use tools like ultrasonic thickness gauges to measure the thickness of the tank walls. This will help you determine if the tank is still structurally sound. If the walls are too thin in some areas, it might be a sign that the tank needs significant repairs or even replacement. Also, check the fittings, valves, and pipes connected to the tank. These parts can also be prone to wear and tear.
Step 2: Cleaning
Once you've completed the inspection, it's time to clean the tank. Cleaning is crucial because it removes any remaining chemicals, debris, and contaminants. First, empty the tank completely. Make sure to follow all safety protocols when handling the chemicals. You might need to use specialized equipment to transfer the chemicals safely.
After emptying, use high - pressure water jets to clean the interior of the tank. This can help remove stubborn residues. For more stubborn contaminants, you might need to use chemical cleaners. But be careful when choosing the cleaner, as it should be compatible with the materials of the tank and the chemicals that were previously stored.
Don't forget to clean the exterior of the tank as well. Remove any dirt, rust, or paint that might be peeling off. A clean exterior not only looks better but also allows you to spot any potential issues more easily.
Step 3: Repair
Based on the inspection results, start making the necessary repairs. If there are small holes or cracks in the tank walls, you can use welding or patching techniques. Welding should be done by a professional welder who has experience working with chemical storage tanks. They need to ensure that the welds are strong and leak - proof.
For corroded areas, you can remove the rust using sandblasting or wire brushing. After removing the rust, apply a corrosion - resistant coating. There are different types of coatings available, such as epoxy coatings, which can provide a long - lasting protective layer.
If the fittings, valves, or pipes are damaged, replace them with new ones. Make sure to choose high - quality replacement parts that are compatible with the tank and the chemicals it will store. You can find a variety of replacement parts for different types of tanks, like Liquid Storage Tank, Propane Tank, and Deoxygenation Tower Reflux Tank.
Step 4: Testing
After the repairs are done, it's essential to test the tank. Pressure testing is a common method. Fill the tank with water or a non - reactive fluid and pressurize it to a specified level. Monitor the tank for any signs of leaks or pressure drops. If there are any issues, go back and re - check the repairs.
You can also perform a visual inspection again after the pressure test. Look for any new signs of damage or leaks. Additionally, if the tank will be used to store specific chemicals, you might need to conduct chemical compatibility tests to ensure that the tank and its new coatings can withstand the chemicals without reacting.
Step 5: Coating and Painting
Once the tank has passed all the tests, it's time to give it a fresh coat of paint. Painting not only improves the appearance of the tank but also provides an extra layer of protection against the elements. Choose a paint that is suitable for chemical storage tanks. It should be resistant to corrosion, chemicals, and UV rays.
Before painting, make sure the surface of the tank is clean and dry. Apply the paint in multiple thin coats for better coverage and durability. Follow the manufacturer's instructions regarding drying times between coats.
Step 6: Documentation
Throughout the refurbishment process, it's important to keep detailed documentation. Record the inspection results, the cleaning procedures, the repairs made, the testing results, and the coating and painting details. This documentation is useful for future reference, maintenance, and compliance purposes. It can also be required by regulatory authorities.
Safety Considerations
Refurbishing a chemical storage tank is a dangerous job, so safety should always be your top priority. Wear appropriate personal protective equipment (PPE), such as gloves, goggles, respirators, and protective clothing. Make sure the work area is well - ventilated, especially when using chemicals or performing welding.
Follow all local, state, and federal regulations regarding the handling, storage, and refurbishment of chemical storage tanks. Obtain any necessary permits before starting the work. And if you're not experienced in working with chemical storage tanks, it's a good idea to hire a professional contractor who has the expertise and equipment to do the job safely.
Why Refurbish?
You might be wondering why you should go through the trouble of refurbishing an old tank instead of just buying a new one. Well, there are several reasons. First of all, it's cost - effective. Buying a new chemical storage tank can be quite expensive, especially for large - scale tanks. Refurbishing can save you a significant amount of money.
Secondly, it's environmentally friendly. Recycling and reusing an old tank reduces the demand for new materials and the energy required to manufacture them. It also helps in reducing waste.
Finally, if the tank has been in use for a while, it might already be well - integrated into your existing system. Refurbishing it allows you to keep using it without having to make major changes to your setup.
Conclusion
Refurbishing an old chemical storage tank is a multi - step process that requires careful planning, inspection, cleaning, repair, testing, and documentation. By following these steps and prioritizing safety, you can extend the lifespan of your tank and ensure it continues to function properly.
If you're in the market for a chemical storage tank, whether it's a new one or looking to refurbish an old one, we're here to help. We have a wide range of high - quality tanks and the expertise to assist you with all your tank - related needs. Contact us to start a conversation about your specific requirements and let's work together to find the best solution for you.
References
- "Chemical Storage Tank Handbook" by an industry expert
- Safety regulations from relevant government agencies
- Manufacturer's guidelines for tank coatings and paints